Category Archives: Breakfast

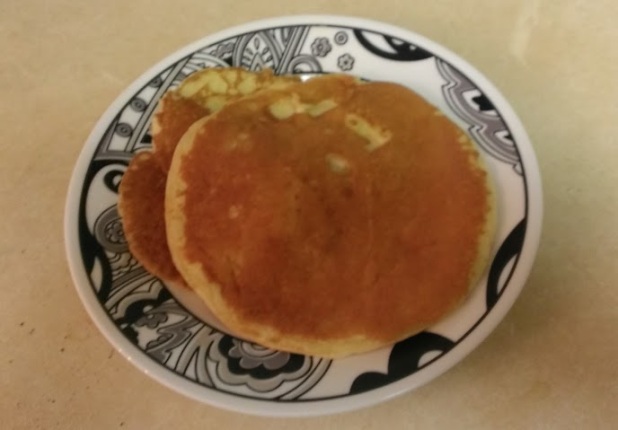
Buttermilk Rice Pancakes

With the weather being so cold lately and dealing with a lot of snow, I have been craving pancakes a lot lately. Snowy weather to me is pancake weather when it comes to breakfast. I have tinkered with several pancake recipes before hitting success with this one. Until now I never was able to make decent gluten free pancakes without a gluten free pancake mix. The flours I used for these pancakes I got from an Asian store near my house for about $1 per pound. Bob’s Red Mill also makes these flours as well as xanthan gum, which I used in these pancakes and use in most of my baked goods to help hold them together. These pancakes are great smaller or larger, but I prefer them larger since my mom always made hers larger and that is what I am used to with homemade pancakes.

Buttermilk Rice Pancakes – Makes 4 large pancakes or 8 regular sized pancakes (serves 2 to 3 people)

Ingredients:

  • ½  cup of rice flour
  • ½ cup of sweet rice flour
  • 2 teaspoons of sugar or sweetener (splenda and stevia will work in place of the sugar)
  • 2 teaspoons of baking powder
  • 1/2 teaspoon of salt
  • 1 teaspoon of xanthan gum
  • 1 egg
  • 1 cup of buttermilk (if you don’t have buttermilk, simply add a teaspoon of vinegar or lemon juice to a cup of milk and leave it sit for a minute. Then stir milk and use as buttermilk).
  • 2 teaspoons of canola oil
  • Cooking spray or canola oil for cooking pancakes

Directions:

  1. Mix rice flour, sweet rice flour, sugar, baking powder, salt, and xanthan gum together in a large bowl.
  2. Mix in buttermilk until the pancake mixture is smooth.
  3. Mix canola oil, and egg together in a small bowl.
  4. Add in the mixture from the small bowl into the large bowl and mix until everything is completely mixed together.
  5. Add a little oil or cooking spray to the griddle and cook pancakes one by one on medium heat for 3-5 minutes per pancake, turning once halfway through. Watch them carefully, they cook quickly and don’t flip them too much. They will end up flatter if you do.
  6. Serve and enjoy!

GF Buttermilk Rice Pancakes

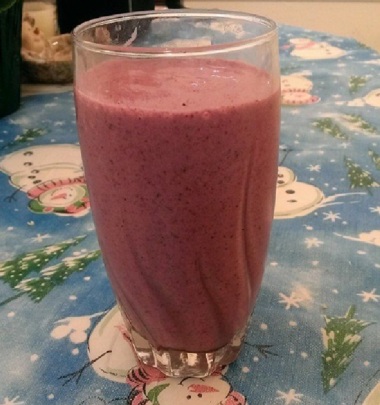
Berries and Cream Protein Smoothie

With the cold weather continuing and the holiday season being over, I have been trying to eat healthier and have also been getting tired of winter. This smoothie was my temporarily getaway from winter this morning. As someone that was born in the Spring, once the holidays are over, I look forward to Spring and wish for the rest of winter to be gone. Since fresh berries are very expensive in the winter and aren’t very fresh, I used frozen berries and milk in this smoothie. Frozen berries are often cheaper this time a year, I get mine from Trader Joe’s. I also used vanilla protein powder to give it the “cream” effect and to make me full longer. Just be sure to check the protein powder you buy for gluten, some brands are not gluten free. I used Designer Whey vanilla, which is gluten free and is sweetened with Stevia. This is perfect for a light breakfast or shared with someone as a snack or healthy dessert. Here is the recipe:

Berries and Cream Protein Smoothie – Makes 1 large smoothie or 2 smaller smoothies

Ingredients:

  • 2 cups of frozen mixed berries (my frozen blend had strawberries, blueberries, raspberries, and blackberries)
  • 1 1/2 cups of milk (any kind of milk will work)
  • 1 scoop of vanilla protein powder

Directions:

  1. Place frozen mixed berries and milk in the blender and puree until everything is blended together and all chunks of fruit are completely smooth.  Feel free to add additional milk if you want your smoothie to be thinner.
  2. Add vanilla protein and blend until protein powder is completely blended with the smoothie mixture.
  3. Serve and enjoy!

Mixed Berry Protein Smoothie

Pumpkin Spice Rice Pudding

Like many others this time of year, I am currently enjoying the leaves changing colors and the cooler weather. I also enjoy the seasonal foods like pumpkin, apples, and many other fall seasonal foods and treats. This rice pudding is one that showcases a seasonal fall food and can be dessert or breakfast. This pudding is basically pumpkin pie filling and rice pudding coming together and becoming a delicious dish of its own.

Pumpkin Spice Rice Pudding – Serves 2 to 4

Ingredients:

  • 3/4 cup of uncooked rice
  • 1 1/2 cups of milk
  • 1/2 cup of sugar
  • 1/4 teaspoon of salt
  • 2 eggs, whisked together
  • 1 15 oz can of pumpkin
  • 1 teaspoon of cinnamon
  • 1/2 teaspoon of pumpkin pie spice
  • 1/2 teaspoon of vanilla extract

Directions:

  1. Bring 1 1/2 cups water to a boil in a large saucepan and stir the rice into the boiling water.
  2. Reduce the pan to low heat,  cover, and simmer for 20 minutes.
  3. Drain rice and combine 1 1/2 cups of cooked rice, 1 cup of milk, pumpkin, pumpkin pie spice, cinnamon, sugar, vanilla, and salt into a large saucepan.
  4. Cook over medium heat until thick and creamy, about 15 to 20 minutes. Be sure to stir the mixture every few minutes.
  5. Whisk eggs and remaining 1/2 cup of milk together.
  6. Stir in milk and egg mixture and cook for two more minutes, stirring constantly.
  7. Remove from heat and allow pudding to cool in a large container for at least 1 hour in the refrigerator. Serve and enjoy!

Image

Cinnamon Almond Cake in a Mug

One of the hardest parts of eating and cooking gluten free for me is dessert. Baking gluten free can be very frustrating. Especially when you are new at gluten free baking. I am still learning how to bake gluten free and I have been gluten free for almost six months. As difficult as baking gluten free can be,  this recipe is very easy to make and other than the almond flour/meal, all of the ingredients are easy to find at your local supermarket. This cake is not only great for dessert with some ice cream or whipped cream, but also on its own for breakfast.

Luckily, if you own a food processor, blender, or coffee grinder, you can easily make your own almond flour, almond meal, and other nut flours at home. For almond flour, you pulse blanched almonds in your blender, coffee grinder, or food processor until ground. Almond meal uses regular almonds and will be less fine in texture than almond flour. When pulsing the nuts, be sure not to over grind the nuts or you may end up with almond butter. Then sift the almond flour into a bowl using a sifter and store for later use. For additional instructions and visuals for making almond flour and almond meal, read this: http://www.pastrypal.com/2010/12/pastry-technique-make-your-own-almond-flour/. This method can be also used to make other nut flours.

Cinnamon Almond Cake in a Mug – Serves 1 to 2

Ingredients:

  • 2 tablespoons of unsweetened applesauce
  • 1 large egg
  • 1/2 teaspoon of pure vanilla extract
  • 1/4 teaspoon of ground cinnamon
  • 2 teaspoons of dark brown sugar, unpacked
  • 1/8 teaspoon of baking soda
  • 1/3 cup plus 1 tablespoon of almond flour or almond meal (I used almond meal from Trader Joe’s)
  • 1/8 tsp of salt

Directions:

  1. Put dark brown sugar, cinnamon, salt, baking soda, and almond flour into a small bowl.
  2. Mix everything in the bowl together.
  3. Add 1 large egg, vanilla extract, and unsweetened applesauce into bowl.
  4. Stir until all ingredients are completely mixed together.
  5. Spoon mixture into a coffee mug. Make sure you use at least a standard sized mug or a bigger mug.
  6. Microwave for 1 minute and 15 seconds to 2 minutes, depending on the wattage of your microwave (I have a 1300 watt microwave and my cake took 1 minute and 15 seconds). After the first 30 seconds, you may have to open the door of your microwave every 15 to 20 seconds for a few seconds due to the cake rising while cooking.
Almond Cake
As you can see, the cake deflates some after being removed from the microwave,

Enjoy! Great on its own or with a scoop of vanilla ice cream, some vanilla or cream cheese frosting, or whipped cream.

Huevos Rancheros

I did not grow up eating Mexican food other than the occasional taco night or trip to Taco Bell. Until I went away to college at the age of 19, I had never had “real” Mexican food. However, once I did I really ended up enjoying the food that I was served. My roommate who was Hispanic introduced me to all kind of Latin American food including Mexican food such as enchiladas, guacamole, rice and beans, empanadas, and this breakfast dish called huevos rancheros. While this dish is often served on flour tortillas, I have made my own version with corn tortillas with some success. Mine is also fairly light compared to some I have had in the past. Hope you enjoy this, keep in mind this is likely not completely authentic. However, I can assure you that this is a delicious sit down breakfast or brunch dish to serve on its own or with hash brown potatoes or fruit on the side.

Huevos Rancheros – Serves 2

Ingredients:

  • 4 large eggs
  • 2 tablespoons of milk
  • 1/8 of a teaspoon of salt
  • 1/8 of a teaspoon of black pepper
  • Cooking spray
  • 4 corn tortillas
  • 1/2 cup of refried beans
  • 1/4 cup of salsa

Directions:

  1. Whisk eggs, milk, salt, and pepper together with a whisk or fork in a medium sized bowl until the color and texture of the eggs are uniform throughout the mixture.
  2. Heat up the refried beans for 3-5 minutes or until the refried beans are hot on medium heat in a small saucepan or microwave the refried beans for 1 minute in a small container.
  3. Spray medium sized pan liberally with cooking spray.
  4. Cook eggs in large pan for 3-5 minutes on medium heat or until eggs are mostly solidified. Lightly stir eggs every 30 seconds to 1 minute while cooking them.
  5. Heat up corn tortillas according to directions on the package using the microwave or stove.
  6. Layer on top of each corn tortilla 2 TBSP of refried beans, then 1/4 of the scrambled eggs, and top eggs with 1 TBSP of salsa.
  7. Serve and enjoy!
Huevo Rancheros
The refried beans are hidden under the eggs.

* Optional toppings for these Huevo Rancheros include shredded cheese, sliced avocado or guacamole, crumbled chorizo sausage, diced bacon, and/or sour cream.